ENCLOSED WALLS – SLOW RISE SPRAY FOAM PROJECT GUIDE


DETERMINE YOUR GOALS
The first step in any successful project is making sure you know what you are setting out to accomplish. With an enclosed wall that is going to be filled with slow rise spray foam, there really isn’t an option to spray a specific thickness.
What gets pumped into the wall is going to end up the size of the empty space. So, the great news is that in a standard 2×4 framed wall, you’ll end up with 3.5+ inches of dense, moisture stopping closed cell foam. The downside is that 2 inches of closed cell foam would also get you great results at about half the cost, but with the added expense of removing and reinstalling drywall.
DO THE MATH
Your total required number of spray foam kits is determined by your total board feet need. A board-foot is one squared foot at one inch thick. If you are filling a 2×4 framed wall, take the length times the height of the wall to get the square footage, and then multiply that number by the thickness of empty space you are filling, in this case, 4”.
Take your total board-feet need of all of your walls, and then add about 20% or more for waste. Divide your total board-feet need by 600 (the board-feet a Foam it Green 602 kit can cover), round it up to the next whole kit, and place your order!
Keep in mind, the amount a kit can cover is measured in “free rise” meaning how much it would expand to if it was not held back by anything. With slow rise foam, the studs, substrate, and curing foam will prevent the foam from expanding as much as it would if you sprayed it on an open surface. This is why more waste should be factored in for this type of project.
PREPARE FOR SUCCESS
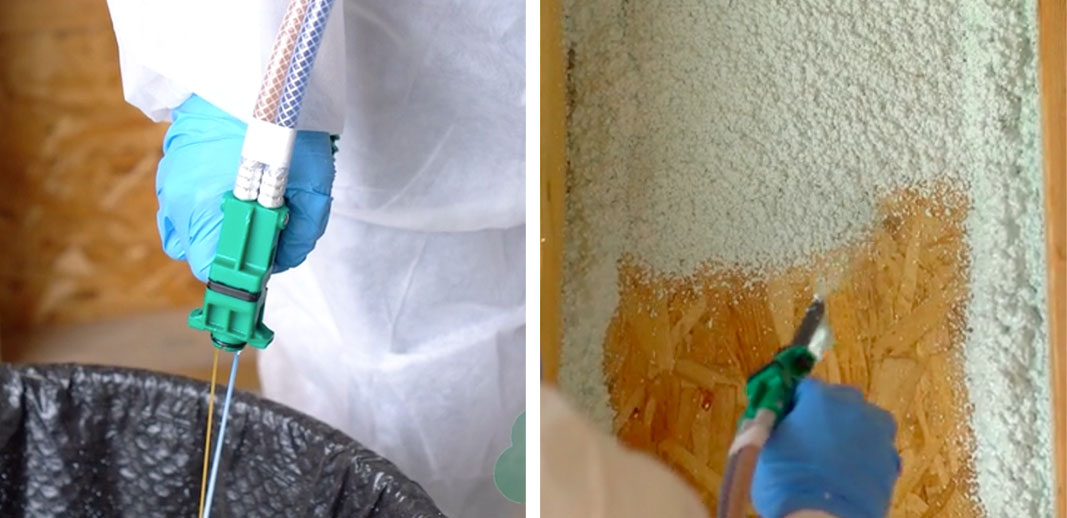
It’s difficult to get foam off of surfaces it hits. So, be sure to take the time to cover anything you do not want foam stuck to including floors, windows, equipment in the area, and even you once you start spraying! Along with the recommended PPE, the sprayer should have no exposed skin or hair during application. How do you get foam out of a beard? In a word, scissors. Foam can expand out of the holes you’ve made in the walls, so attaching plastic sheeting or drop cloths to the baseboard or just under the holes is recommended. Whatever tubing you decide to purchase to attach to the nozzles to feed into the wall should be pre-cut, no longer than 3 feet long, and attached to the nozzles to prevent you from having to make them once you start spraying.
TECHNIQUE TIPS
There is no one-size-fits-all approach to how long to hold the trigger when filling a wall cavity. Most customers inject foam into just a single opening at the beginning, and then count to ten-one-thousand and release. Watch and wait to see how high the foam expands. If it comes up past the hole, reduce your time for trigger pull. Conversely, if it doesn’t make it to the hole, add time.
SPECIAL NOTES ENCLOSED WALLS
How to patch the holes that need to be made in the walls to inject the foam is up to the user. Just remember, bigger holes means bigger patches! “Splinting” the tubing can be helpful to make sure you are pointing the foam downward in the cavity. The outer diameter of the threaded end of the mixing nozzle is 5/16”, so whatever tubing the user selects should ideally have an inner diameter also that size for a snug fit.
It is highly recommended to use clear tubing, because the foam going into the cavity absolutely must be light green in color to ensure it will bond, expand, and cure. Pumping off-ratio component into a wall creates a very laborious removal situation that may require opening up the wall. In a standard height wall, holes can be made between each set of studs at 3’, 6’, and then as close to the top of the wall as possible.
Be aware of any horizontal fire stops in between the studs as these will also stop the foam from traveling where it needs to go. Slow rise foam can only be used in an empty, vertical wall.
Overhead ceiling or floor applications are not recommended, and any pre-existing insulation in the cavity will prevent the foam from fully filling.
Recommended product for slow rise spray foam projects
Foam it Green® SLOW RISE
Closed Cell Spray Foam

Foam it Green® SLOW RISE LGWP
Closed Cell Spray Foam
CA, CO, HI, MA, MD, NJ, NY, RI, WA, VT, as well as Canada.

Green Means Go
We have green indicator foam. Yellow-plus-blue-equals-green foam to be specific. That way you know you have the right mix the whole way through your project, minimizing waste. Green means go!
Better Gun Means Better Results
We have the best gun in the business. The face of the gun has been designed to have two, solid ear clips so the nozzles won’t fly off during spray. Many competitor guns have just a single clip at the top. All of Foam it Green’s guns are pressure tested before shipping out.

The Perfect Temperature
We have temperature strips on the tanks to help you know the kit is up to temp and ready to be sprayed. Improper tank temperature is the #1 cause of off-ratio spraying.

Keep The Foam Flowing
You get a full 10 mixing nozzles with each Foam it Green 602. You may have extra, and that’s ok! It’s a lot better than running short and shutting down the project to wait for more.

Fire Retardant
Our fast rise, closed cell foam is ASTM E84 Class 1 fire retardant insulation, standard. We don’t offer a cheaper version of the foam that isn’t Class 1 because we don’t want people accidentally buying potentially less-safe. *Please note in areas where the low-GWP version of the foam is required, it is Class 2 flame retardant.

Anti-Microbial
Our fast rise, closed cell foam is ASTM G21 Anti-Microbial, adding mold stopping power to your project.
